Premium Copper Fittings & Tubes for HVAC and Refrigeration Systems

Try us once, you will be persuaded by the fantastic quality.

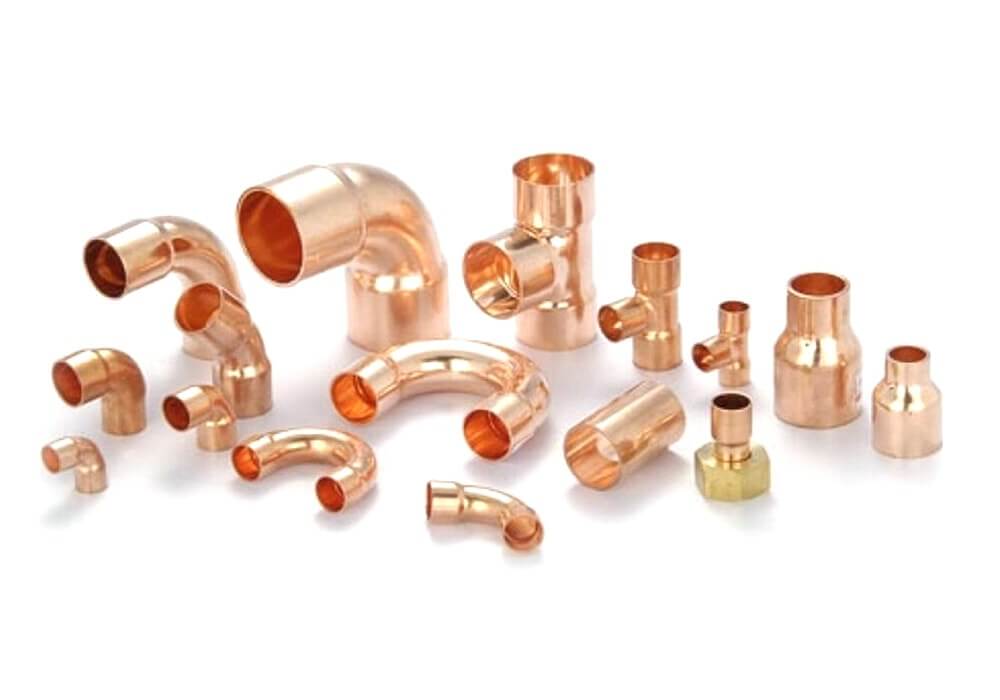
Welcome to CoolCore, the premier wholesaler of top-quality Copper Fittings & Tubes for refrigeration and HVAC systems. Our comprehensive product portfolio features an extensive array of first-rate copper fittings and tubes, including elbows, tees, couplings, reducers, and beyond. We deliver tailored solutions for diverse industries such as HVAC, refrigeration, and plumbing.

At CoolCore, we recognize the critical role that dependable and long-lasting fittings and tubes play in ensuring optimal performance for any refrigeration or HVAC system. That’s why we procure only the finest quality copper fittings and tubes from reputable manufacturers. Crafted from pure copper and adhering to rigorous quality standards, our products guarantee exceptional performance and durability.

Our dedication to providing outstanding customer support is unwavering, and we strive to ensure that our clients receive the most effective solutions for their refrigeration and HVAC requirements. Our team of seasoned experts is readily available to provide guidance and support throughout the entire journey, from product selection to seamless installation. Experience the CoolCore difference today.

Discover Our Gauranteed Components

Explore CoolCore’s impressive selection of premium copper fittings & tubes, specifically engineered for high-performance HVAC, refrigeration, and plumbing systems. Our products provide the durability, reliability, and efficiency that industry professionals demand.
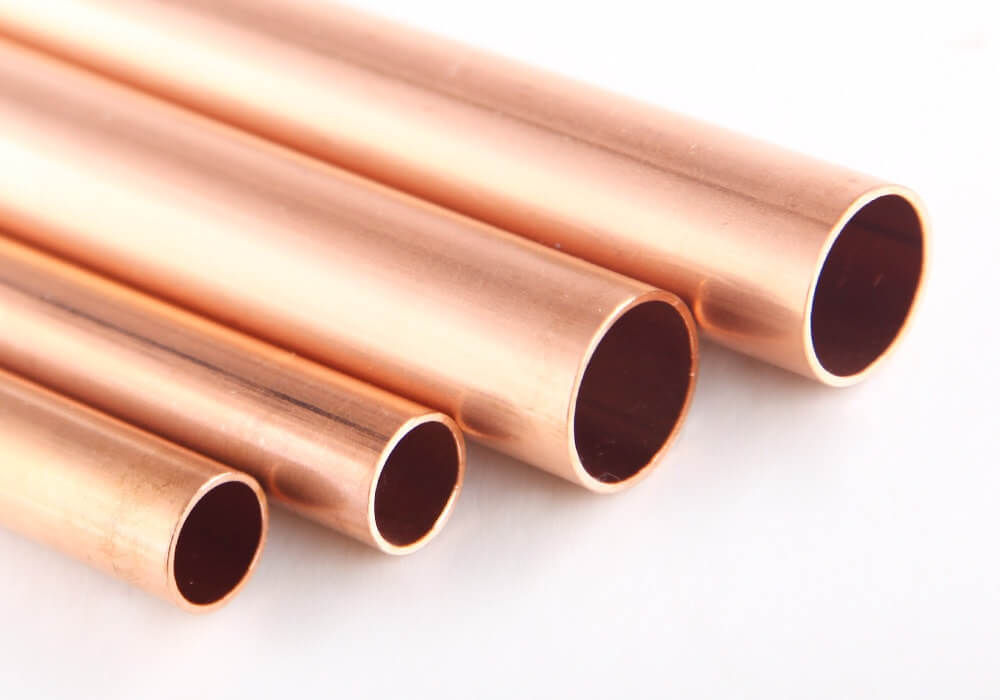
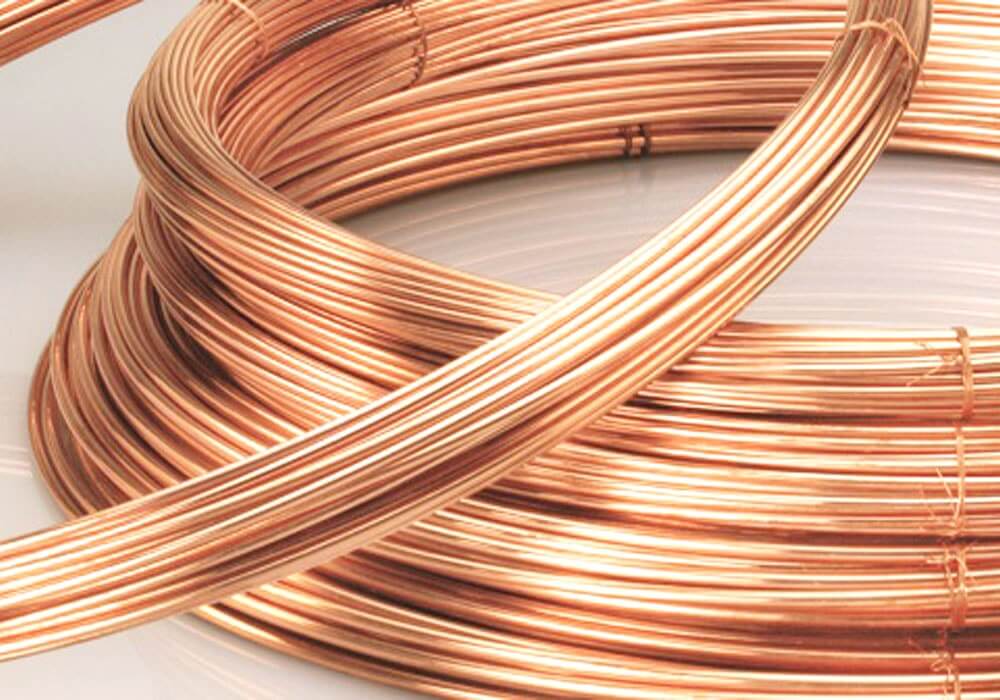
COPPER-COIL

Pancake coil copper tube

O.D.: 1/4″ to 7/8″

Length: 15, 30, 50 m

Get A Quote
COPPER-TUBE_STRAIGHT-LENGTH

Straight length copper tube

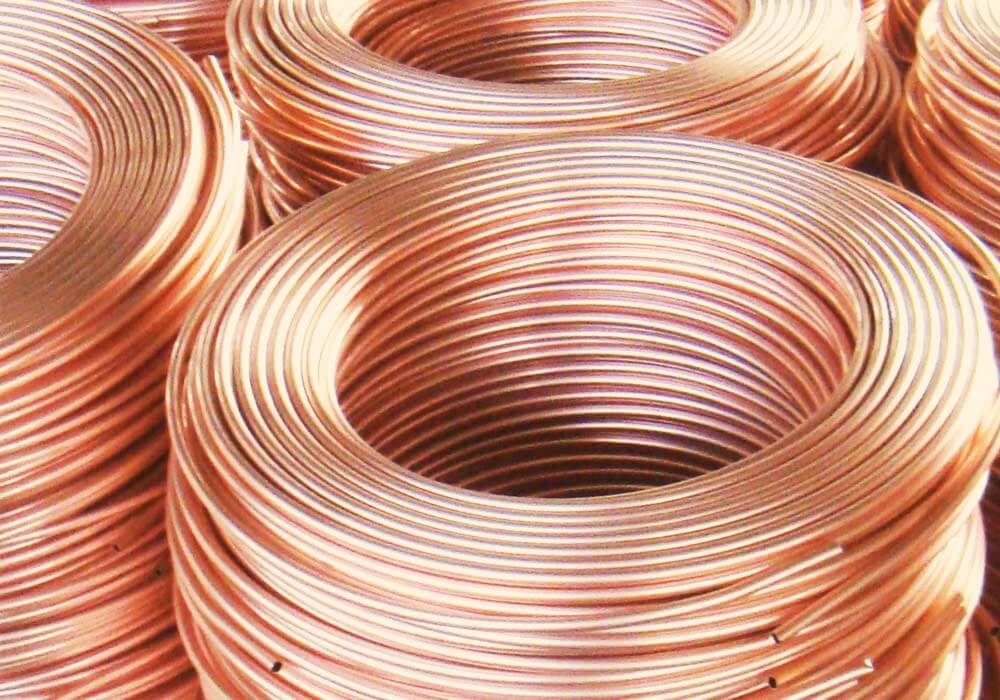
O.D.: 1-1/8″ to 4-1/8″

Length: 3, 5, 5.8 m

Get A Quote
COPPER-TUBE_LWC

LWC copper tube

Supplied with board reels, approx. 100-200kg per coil

Get A Quote
COPPER-TUBE_CAPILLARY

Capillary copper tube

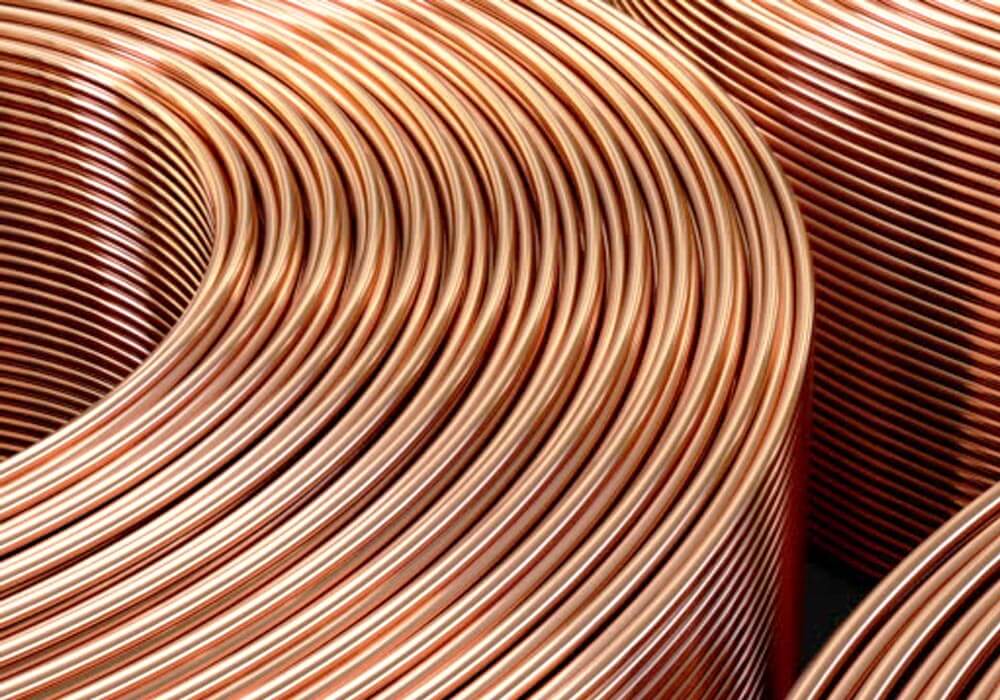
I.D.: from 0.026” (0.7mm) to 0.090” (2.3mm)

O.D.: from 0.070” (1.9mm) to 0.145” (3.5mm)
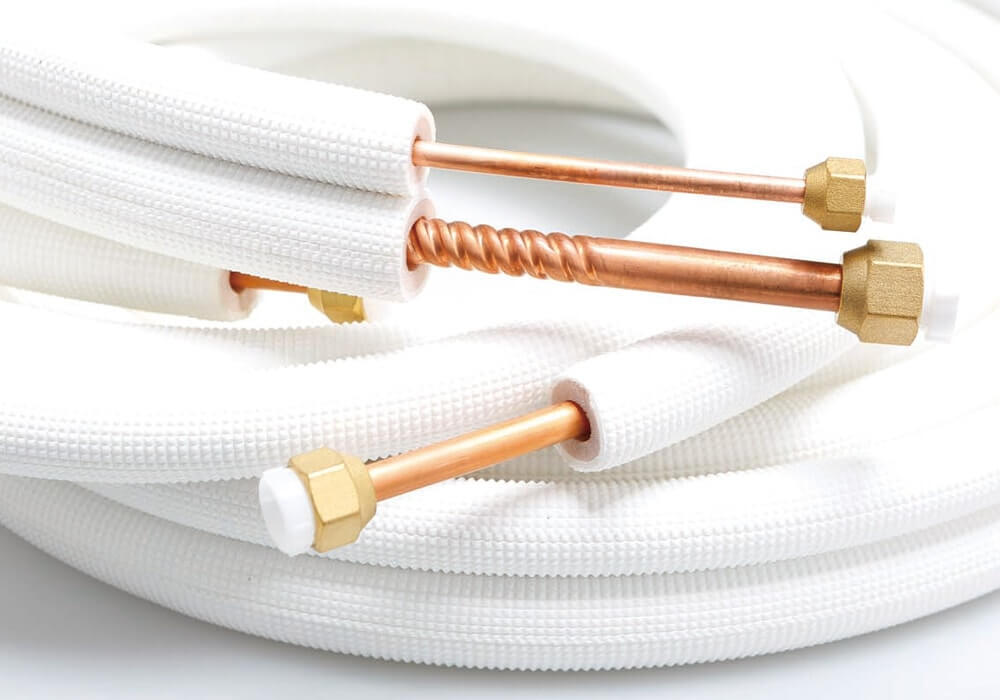
Get A Quote
COPPER-TUBE_INSULATED-TUBE-SET

Insulated tube set

Single or twin pair

Length: 3m, 4m or on request

Get A Quote
COPPER-FITTING

Copper fitting

Solder ring on request

Get A Quote
BRASS-FITTING

Brass fitting

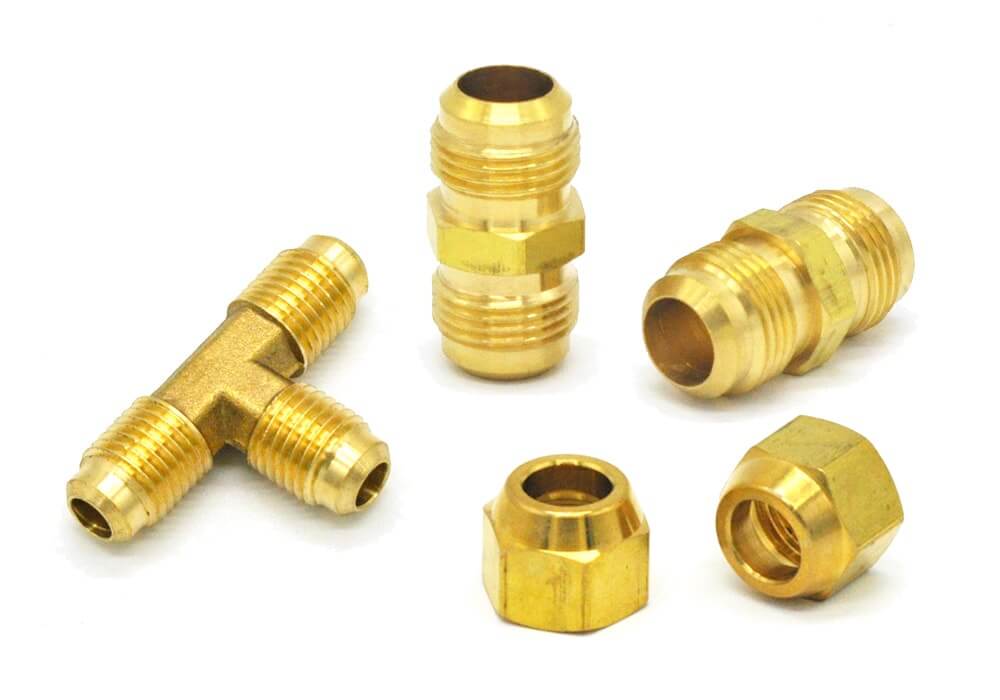
Short nut, forged nut, long nut, union, cap, tee, etc.

Get A Quote

Essential Tips for Copper Pipe Fittings

1. How do I install copper compression fittings for a secure connection?

To install a copper compression fitting, follow these steps:

  • a. Cut the copper pipe to the desired length and deburr the edges.
  • b. Slide the compression nut onto the pipe, followed by the compression ring (ferrule).
  • c. Insert the pipe into the fitting until it seats against the internal stop.
  • d. Slide the compression nut and ring towards the fitting and thread the nut onto the fitting.
  • e. Tighten the nut using two wrenches, one to hold the fitting and the other to tighten the nut. Avoid overtightening.

Yes, copper press fittings are a reliable choice for refrigeration and HVAC systems. They offer a fast, flame-free, and secure connection that can withstand high pressure and temperature. Their reliability and ease of installation make them a popular choice among professionals.

To remove a copper pipe from a push-fit connector, follow these steps:

  • a. Locate the release collar on the connector.
  • b. Press the release collar firmly and evenly with a suitable tool or your fingers.
  • c. While holding the release collar, gently pull the copper pipe out of the connector.

Reusing copper fittings is generally not recommended, especially for critical systems like refrigeration and HVAC. The process of removing and cleaning fittings can compromise their integrity and lead to leaks or failures. It’s best to use new fittings for each installation to ensure optimal performance and longevity.

To release a copper push-fit connection safely and effectively, follow these steps:

  • a. Turn off the water supply or system pressure.
  • b. Locate the release collar on the push-fit fitting.
  • c. Press the release collar firmly and evenly with a suitable tool or your fingers.
  • d. While holding the release collar, gently pull the copper pipe out of the fitting.

To install copper press fittings, follow these steps:

  • a. Cut the copper pipe to the desired length and deburr the edges.
  • b. Mark the insertion depth on the pipe.
  • c. Slide the fitting onto the pipe until it reaches the marked insertion depth.
  • d. Use a compatible press tool to press the fitting, ensuring a secure and leak-free connection.

To clean and prepare copper pipe fittings for medical gas or oxygen use, follow these steps:

  • a. Remove any dirt, grease, or debris using a clean, lint-free cloth and a suitable solvent.
  • b. Use a clean, stainless steel brush to remove any surface oxidation.
  • c. Rinse the fittings with clean water and dry them thoroughly with a clean, lint-free cloth.
  • d. Store the cleaned fittings in a clean, sealed container or plastic bag until installation.

To fix a leaking copper pipe fitting, follow these steps:

  • a. Turn off the system pressure and drain the affected section.
  • b. Identify the source of the leak and determine if the fitting can be repaired or needs replacement.
  • c. If repairable, clean the joint and re-solder or tighten the fitting as needed. If not, replace the fitting with a new one, following proper installation procedures.
  • d. Test the repaired or replaced fitting by restoring system pressure and checking for leaks.
  • e. Insulate and protect the joint to prevent future leaks.

To prevent future leaks in refrigeration and HVAC systems:

  • a. Use high-quality fittings from reputable manufacturers.
  • b. Follow proper installation procedures and guidelines.
  • c. Inspect joints regularly for signs of wear or corrosion.
  • d. Perform routine maintenance and address any issues promptly.

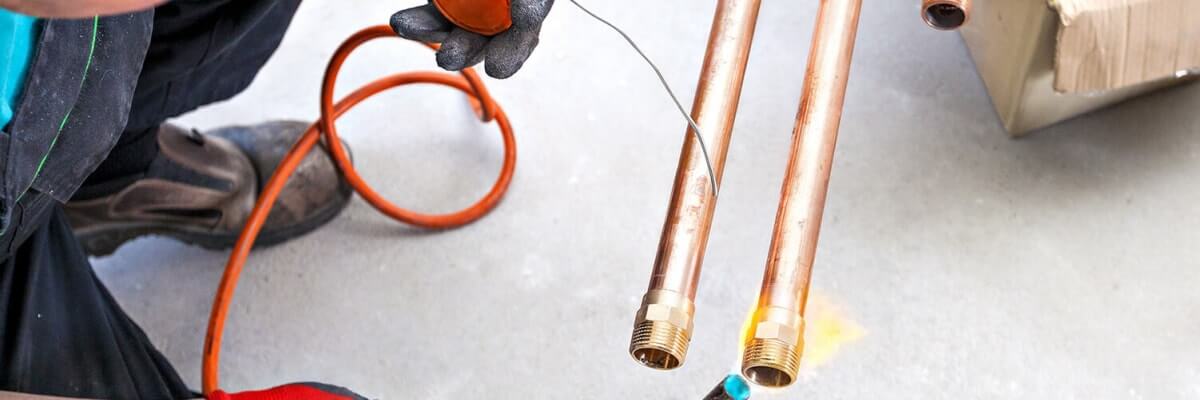
To solder copper pipe fittings, follow these best practices:

  • a. Clean the pipe and fitting surfaces with a wire brush or abrasive cloth to remove any dirt, grease, or oxidation.
  • b. Apply a thin layer of flux to the pipe and fitting surfaces to facilitate the flow of solder.
  • c. Assemble the joint, ensuring proper alignment and insertion depth.
  • d. Heat the joint evenly with a torch, focusing on the fitting to draw solder into the joint.
  • e. Touch the solder to the joint when the fitting is hot enough, allowing capillary action to draw solder into the joint. Avoid overheating the joint.
  • f. Allow the joint to cool naturally without disturbing it. Clean any residual flux after the joint has cooled.

To remove a soldered copper fitting, follow these steps:

  • a. Turn off the system pressure and drain the affected section.
  • b. Protect any heat-sensitive components near the joint with a heat shield or damp cloth.
  • c. Apply heat to the fitting with a torch, focusing on the areas where the solder is visible.
  • d. As the solder melts, use pliers or a suitable tool to gently pull the fitting away from the pipe. Be careful not to apply excessive force that could damage the pipe.
  • e. Clean and prepare the pipe end for a new fitting or repair.

To tighten and maintain threaded copper fittings, follow these steps:

  • a. Apply thread sealant or Teflon tape to the male threads of the fitting, ensuring complete coverage.
  • b. Thread the fitting onto the pipe or component by hand until snug.
  • c. Use two wrenches to tighten the fitting, one to hold the pipe or component and the other to tighten the fitting. Avoid overtightening.
  • d. Inspect the joint regularly for signs of wear or leaks and address any issues promptly.
  • e. Perform routine maintenance on the system, including tightening and replacing fittings as needed.